Dialog images
Dialog images are used to define wich images should be displayed along with the dialog text. They are identified by image code and can target where to be displayed.
Setup the images provider
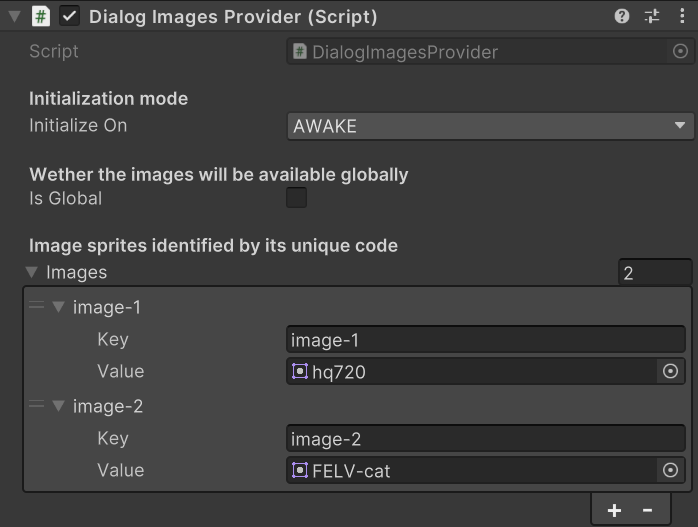
As said, you will be identifying images by image code in your dialogs provider. To do so first you need to create a GameObject and attach a DialogImagesProvider script. This script, when initialized, will provide images to all dialogs in the scene (if global is checked, it will provide those images also in future scenes). You can fill up the array of Images with the images you want and their image code (unique).
You can have multiple DialogImagesProvider per scene. It is recommended if you have lots of images and you want to keep things organized.
Also remember to check the global property if you want to keep some images loaded in memory across all the game's lifecycle (so you don't have to initialize them in every scene).
Example
Let's see how would this look in a real example. We fill the Images array in the DialogImagesProvider script providing two images each with their unique code. Then in our dialogs file we can fill up the images array indicating the image code in the image field. In this example we are not using the target field, we will learn about it later.
| |
Display images
Now that we are providing images and we are using them in our dialogs file, its time to display them. We can achieve this by using the DialogImagesDisplay script.
We need to attach this script to a GameObject. Then we will need to fill up two essential fields.
- Display Id: this field represents the id of the displayer (if left empty it will be the default one).
- Image Display: this field stores the
UnityEngine.UI.Imagescript that will display the image.
You can have more than one displayer per scene. Each will be available during the lifecycle of the attached GameObject.
You cannot have more than one displayer with the same id. Having repeated ids can lead to unexpected behaviours. You can repeat ids once elder displayers are unloaded, for example, when you change scenes.
Example
Let's see how we can display images to specific targets.
| |
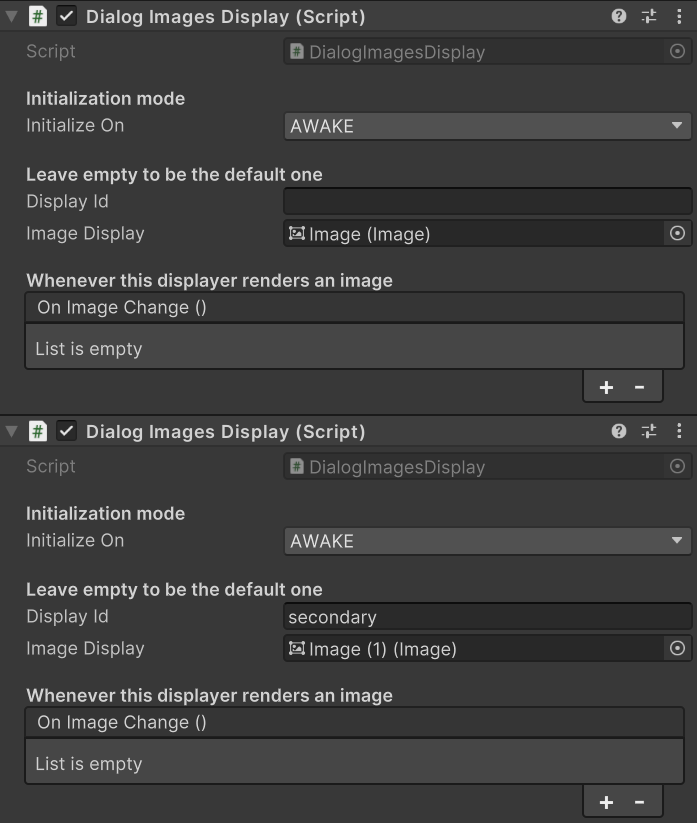
As you can see, the dialog dialog-8 will display the image-1 on the default displayer and the dialog-9 will display two images, one in the secondary displayer and the other in the default one.